How to Add a Domain in Microsoft 365 Tenant: Complete Step-by-Step Guide
-
 22 November 2025
 Office 365 Migration
-
 Written by
Justin Greaves
Written by
Justin Greaves
Every Microsoft 365 journey begins with a default address: yourcompany.onmicrosoft.com. It’s a functional starting point, but it doesn’t represent your business. It’s like moving into a new office building where the sign out front has the landlord’s name instead of your own.
Adding your own domain is the process of putting your name on that sign. It’s the crucial step that transforms Microsoft 365 from a generic suite of tools into your company’s digital headquarters. By integrating a custom domain, you claim your space within the platform, enabling professional email addresses, branded collaboration spaces, and a unified identity that builds trust with every interaction. This guide will walk you through the complete process to add a new domain to your Office 365 tenant, ensuring your brand is at the center of your digital experience from the very first step.
What Does Adding a Domain to Microsoft 365 Mean?
Adding a domain to your Microsoft 365 tenant replaces your default onmicrosoft.com address with your custom domain, like yourcompany.com. This foundational step enables professional email addresses and integrates your brand across Microsoft 365 services like SharePoint and Teams.
The process centers on verification and integration. You must first prove domain ownership by adding a specific TXT record to your DNS settings, which is a crucial security measure. Once verified, you can assign the domain to user accounts for email and link it to services.
This allows centralized management of multiple domains or subdomains within a single tenant, supporting different departments or brands while maintaining unified control. For businesses needing expert assistance, services like Apps4Rent can help manage the entire domain configuration process.
Benefits of Adding a Custom Domain to Your Office 365 Tenant
Learning how to add a domain in a Microsoft 365 tenant unlocks a suite of advantages that extend far beyond a simple email change. It is a strategic move that transforms your digital workspace. Here are the key benefits of taking this step:
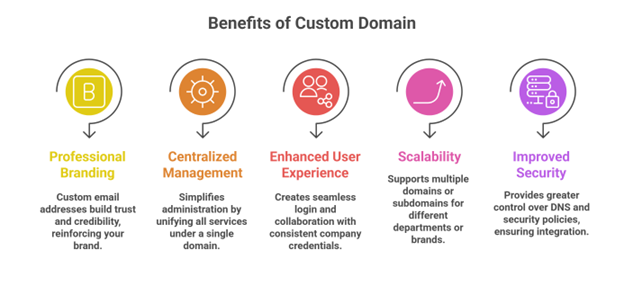
- Professional Branding and Trust: A custom email address instantly elevates your professional image. It builds credibility with clients and partners, making every communication reinforce your brand identity instead of a generic onmicrosoft.com address.
- Centralized Management and Control: When you add a new domain to your Office 365 tenant, you bring all your core services under one unified and familiar identity. This simplifies administration and provides a consistent experience for your entire team.
- Enhanced User Experience: A custom domain creates a seamless login and collaboration environment. Users can access all Microsoft 365 apps with credentials that match their company email, eliminating confusion and streamlining their daily workflow.
- Flexibility for Growth: The process to add a domain to your O365 tenant is designed to scale with your business. You can support multiple domains or subdomains within a single tenant, allowing you to create distinct identities for different departments, brands, or projects without fragmenting your IT management.
- Improved Security and Integration: Using your own domain gives you greater control over DNS and security policies. It also enables deep integration with services like Exchange Online and Microsoft Teams, ensuring your branded identity is present across every platform you use.
Prerequisites Before Adding a Domain
Before you begin the process of adding a domain to your Office 365 tenant, it is important to have a few key items in place. Gathering these prerequisites beforehand will ensure a smooth and successful setup, preventing common roadblocks.
- Administrative Access: You must own the domain you plan to use or have full administrative rights to manage it.
- Access to DNS Settings: You will need the login credentials for your domain registrar or DNS hosting provider.
- Microsoft 365 Administrator Permissions: Your user account in Microsoft 365 must have either Global Administrator or Domain Name Administrator privileges.
- A Plan for Verification: Be prepared to verify your domain ownership by adding a specific TXT or MX record provided by Microsoft to your DNS.
- Technical Preparation: Ensure your web browser allows pop-ups from the Microsoft 365 admin center, as some configuration steps may use them. Also, understand that DNS changes are not instant; allow up to 48 hours for them to fully propagate across the internet, even though it often happens much faster.
- A Clear Integration Strategy: Think ahead about how you will use the domain. Consider which users or services will be assigned to it after verification.
Ensuring you meet these requirements will make the actual task of learning how to add a domain in a Microsoft 365 tenant a much more efficient process.
Step-by-Step Guide to Add a Domain in Microsoft 365 Tenant
This section provides a clear, sequential path to integrate your custom domain. Following these steps will guide you through the entire process, from initial login to final activation.
Step 1: Log in to Microsoft 365 Admin Center
Begin your domain setup by signing into the Microsoft 365 admin center. You must use an account with Global Administrator privileges, as this is the only role with the necessary permissions to add a domain to your Office 365 tenant.
Step 2: Add a New Domain to Your Office 365 Tenant
Once inside the admin center, navigate to the ‘Settings’ section and select ‘Domains’. Click on ‘Add domain’ to launch the setup wizard. This is the starting point for the entire process to add a new domain to your Office 365 tenant.
Step 3: Enter and Confirm Your Custom Domain Name
In the wizard, you will be prompted to type your custom domain name. Enter the complete domain and double-check for accuracy. This domain will become the foundation for your professional email addresses and service URLs.
Step 4: Verify Domain Ownership (TXT Record Verification)
To prove you own the domain, Microsoft will provide a unique TXT record. You must log into your domain registrar’s website and add this exact record to your domain’s DNS settings. Returning to the Microsoft admin center and selecting ‘Verify’ confirms your ownership. This critical security step is mandatory before you can proceed.
Step 5: Add DNS Records at Your Domain Registrar
After successful verification, you will receive instructions for the necessary DNS records. This typically includes an MX record to route your email to Exchange Online and CNAME records for other services. Adding these records at your domain registrar is essential for making your Microsoft 365 services, like email and Teams, function correctly with your new domain.
Step 6: Complete Domain Setup and Activate Services
Once your DNS records are in place and have propagated, finalize the configuration in the admin center. You can now assign the new domain to your users, creating custom email addresses, and link it to services like SharePoint.
DNS Configuration Options for Office 365
After you add a domain to your Office 365 tenant, DNS configuration connects your domain to Microsoft’s services. You can choose automatic setup if your registrar supports it, or manual configuration for greater control.
-
Auto vs Manual DNS Setup
If your domain registrar supports it, automatic DNS setup lets Microsoft configure records for you, saving time and reducing errors. Manual setup is necessary for unsupported registrars or customized configurations, giving you full control but requiring you to create each record carefully in your domain host’s control panel.
-
Required DNS Records for Microsoft 365
Manual setup requires creating specific records: MX records direct email to Exchange Online, TXT records verify ownership and provide email security, CNAME records enable service discovery, and SRV records support communication tools like Teams.
-
MX, CNAME, TXT, and SRV Records Explained
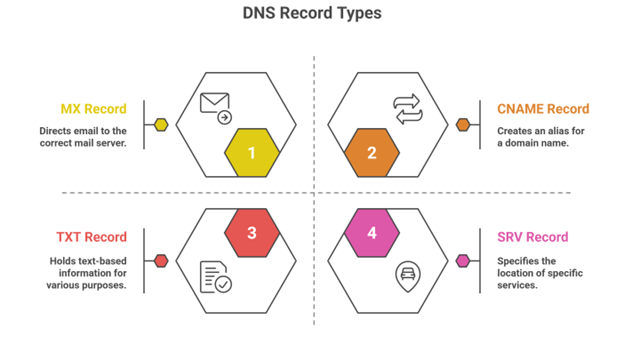
Understanding the role of each record type is helpful for a smooth setup.
- The MX (Mail Exchange) record acts as a signpost, telling other mail servers on the internet where to deliver messages for your domain.
- CNAME (Canonical Name) records create aliases, pointing a service name like ‘autodiscover’ to the actual Microsoft server address.
- TXT (Text) records hold textual information; one contains a unique code to prove you own the domain, while another holds your SPF policy.
- SRV (Service) records are more specialized, defining the specific location for services like instant messaging and online meeting conferencing.
How to Avoid Mail Flow Disruptions While Adding a Domain
Successfully learning how to add a domain in a Microsoft 365 tenant involves careful planning to ensure email continues to flow without interruption. Here are key strategies to maintain mail flow during the process of adding a new domain to your Office 365 tenant.
- Prepare Your DNS Records in Advance: A few days before you add a domain to your O365 tenant, lower the TTL (Time to Live) value on your existing MX record.
- Maintain a Safety Net: Before making any changes, take a complete backup of all your current DNS records. Having a copy of your MX, SPF, and other essential records allows for a quick restoration if something goes wrong.
- Plan a Gradual MX Record Cutover: Avoid switching your MX record abruptly. Schedule the final DNS update for a period of low email traffic, such as a weekend or evening.
- Communicate and Configure Proactively: Notify all users about the planned migration window and the possibility of brief, temporary disruptions. Internally, you can configure the new Microsoft 365 environment as an internal relay domain.
- Validate Continuously: After you add a domain to your Office 365 tenant and update the DNS records, conduct thorough testing. Send test emails to and from external addresses to verify that delivery is working correctly through the new Microsoft 365 mail servers.
Best Practices for Smooth Domain Addition
Following a structured approach when you add a domain to your Office 365 tenant prevents common errors and ensures a seamless integration.
- Prepare Your DNS Settings: Before you begin, lower the TTL (Time to Live) on your current DNS records. This adjustment ensures that future changes propagate across the internet much faster, minimizing potential downtime.
- Verify Ownership Thoroughly: Carefully complete the domain verification step using the TXT or MX record method provided by Microsoft.
- Implement Changes Methodically: Add all necessary DNS records, such as MX, CNAME, and TXT, promptly after verification to activate services like email. Avoid making other unrelated DNS changes at the same time to isolate any potential issues.
- Manage Stakeholder Communication: Inform all users about the planned changes and the expected timeline. Clear communication manages expectations and prepares everyone for a potential brief period of adjustment.
Common Verification Issues and How to Fix Them
When you add a domain to your Office 365 tenant, verification issues can occasionally occur. Here are solutions to the most common problems.
-
TXT Record Verification Fails
First, verify the TXT record matches Microsoft’s provided value exactly, including the complete “MS=” prefix with no additional spaces. Ensure the record is placed at the correct domain level (root versus subdomain). Remove any duplicate TXT records that might cause conflicts, and allow sufficient time—up to 48 hours—for DNS propagation to complete.
-
DNS Conflicts or Overlapping Domain Records
A domain can only be verified in one Microsoft 365 tenant at a time. If you encounter a conflict, the domain likely remains registered in another tenant and must be removed from that previous location before you can proceed. Use online DNS lookup tools to identify and clean up any stale records that might be interfering with verification.
-
Domain Not Propagating or Delayed Updates
DNS changes require time to propagate globally. To minimize delays, consider lowering your domain’s TTL value before you begin the process to add a new domain to your Office 365 tenant. You can monitor propagation status using various online checking tools. If updates take longer than 48 hours, contact your DNS hosting provider for assistance, as the delay may be on their end.
What to Do After Adding the Domain
Successfully learning how to add a domain in the Microsoft 365 tenant is a major milestone, but your work is not quite finished. Several important configuration steps are needed to fully integrate the domain into your daily operations. For many businesses, adding a domain is the first technical step in a broader Office 365 migration project.
-
Configure Users and Assign Licenses
With the domain verified, you can now assign it to your users. Navigate to the Active Users section in the Microsoft 365 admin center. For existing users, you can edit their accounts to assign the new domain as their primary email address. For new users, you can create accounts directly using the new domain. A critical step is to ensure each user has the appropriate Microsoft 365 license assigned, which activates their mailbox and access to applications like Teams and Office apps. In hybrid environments where you add a domain to your O365 tenant, you must also ensure the User Principal Name (UPN) is updated to reflect the new domain for a consistent sign-in experience.
-
Update Email Addresses to the New Domain
The primary goal after you add a new domain to your Office 365 tenant is to start using it for communication. Update the primary email addresses for your users to the new domain. It is equally important to align their User Principal Names (UPN) to match, as this becomes their new login credential.
-
Set the New Domain as Default (Optional)
For long-term convenience, consider setting the new domain as the default within your tenant. This configuration automatically assigns the new domain to any new users or groups you create, streamlining your administrative tasks. The timing of this change is important; during a phased migration, you might wait until all users have been moved over to the new domain to prevent confusion.
When to Add Multiple Domains to a Single Tenant
You can add multiple domains to a single Microsoft 365 tenant to support different brands, subsidiaries, or departments under one centralized administration. This approach streamlines management, as you handle all users, licenses, and security policies from one console instead of managing separate tenants.
This model is ideal for enabling seamless collaboration across your entire organization. Employees from different domains can share resources and communicate in Teams without needing complex external guest access. It is also a common strategy for mergers, acquisitions, or gradual migrations, allowing you to bring legacy email domains into your primary cloud tenant. This is often a key preparatory step for a larger Office 365 tenant to tenant migration, where consolidating domains simplifies the final move.
A key rule is that a domain can only be verified in one tenant at a time. This makes the multi-domain, single-tenant model perfect for a single organization. If you require completely separate administrative control for different legal entities or unrelated businesses, multiple tenants would be necessary.
Let Apps4Rent Simplify Your Microsoft 365 Setup
Adding a custom domain successfully transforms your Microsoft 365 tenant into a professional hub for business communication and collaboration. While this guide provides the essential steps, some organizations prefer expert assistance to ensure a flawless configuration from start to finish.
As a Microsoft Solutions Partner, Apps4Rent specializes in managing these technical integrations. We can handle your entire domain setup, user configuration, and help you select the right Office 365 plans tailored to your business requirements. Our team ensures a seamless transition, allowing you to focus on core business operations while we optimize your Microsoft 365 environment.
Whether you’re deploying a new tenant or enhancing an existing setup, Apps4Rent provides the expert guidance needed to build a robust and professional cloud foundation.
FAQs About Adding a Domain to Microsoft 365
-
How do I add a domain to an Office 365 tenant?
Navigate to the Domains section in your Microsoft 365 admin center and launch the ‘Add domain’ wizard. Follow the steps to enter your domain and verify ownership via a DNS TXT record.
-
Can a Microsoft tenant have multiple domains?
Yes, a single Microsoft 365 tenant can support multiple domains. This is ideal for managing different brands or subsidiaries under one centralized administration
-
How do I add a domain to an Azure tenant?
The process is managed through the Microsoft 365 admin center, not the Azure portal. You add custom domains to your Microsoft 365 tenant, which is built on Azure Active Directory.
-
How to find an Office 365 tenant domain?
Your default tenant domain ends with .onmicrosoft.com and is shown in the Microsoft 365 admin center. You can also find it under your organization profile in the Azure Active Directory admin center.
-
What is the difference between a domain and a tenant in Microsoft 365?
A tenant is your dedicated instance of Microsoft 365, while a domain is a custom web address you add to that tenant for professional email and services.
-
What is a tenant domain?
A tenant domain is your organization’s unique .onmicrosoft.com address. It’s the default identity for your tenant before you add a custom domain.
-
Is it safe to change DNS records while email is active?
Yes, with proper planning. Lowering the TTL value beforehand and making the change during off-peak hours minimizes the risk of mail flow disruption.
-
How long does domain verification take in Microsoft 365?
Verification is often near-instant, but can take up to 48 hours for DNS changes to propagate globally. Delays depend on your domain host.
Apps4Rent – Tier 1 Office 365 Cloud Solution Provider